
DIY Basics: Installing a Security Alarm System in Your Dunkirk Home
Sa
Why Install a Security Alarm System?
Protecting your home in Dunkirk is a top priority, and one of the most effective ways to do this is by installing a security alarm system. With rising concerns about safety, having a reliable system can offer peace of mind and act as a deterrent to potential intruders. While professional installation is an option, many homeowners are opting for the DIY route, which can be both cost-effective and empowering.
Gathering Your Tools and Equipment
Before you begin the installation process, it's essential to gather all the necessary tools and equipment. Typically, you'll need a drill, screwdriver, ladder, and the components of your security system. Most DIY kits come with detailed instructions, sensors, control panels, and any additional hardware required.
Ensure you have a stable internet connection if your system requires online connectivity for real-time alerts. A smartphone or tablet may also be needed to configure settings or control the system remotely.
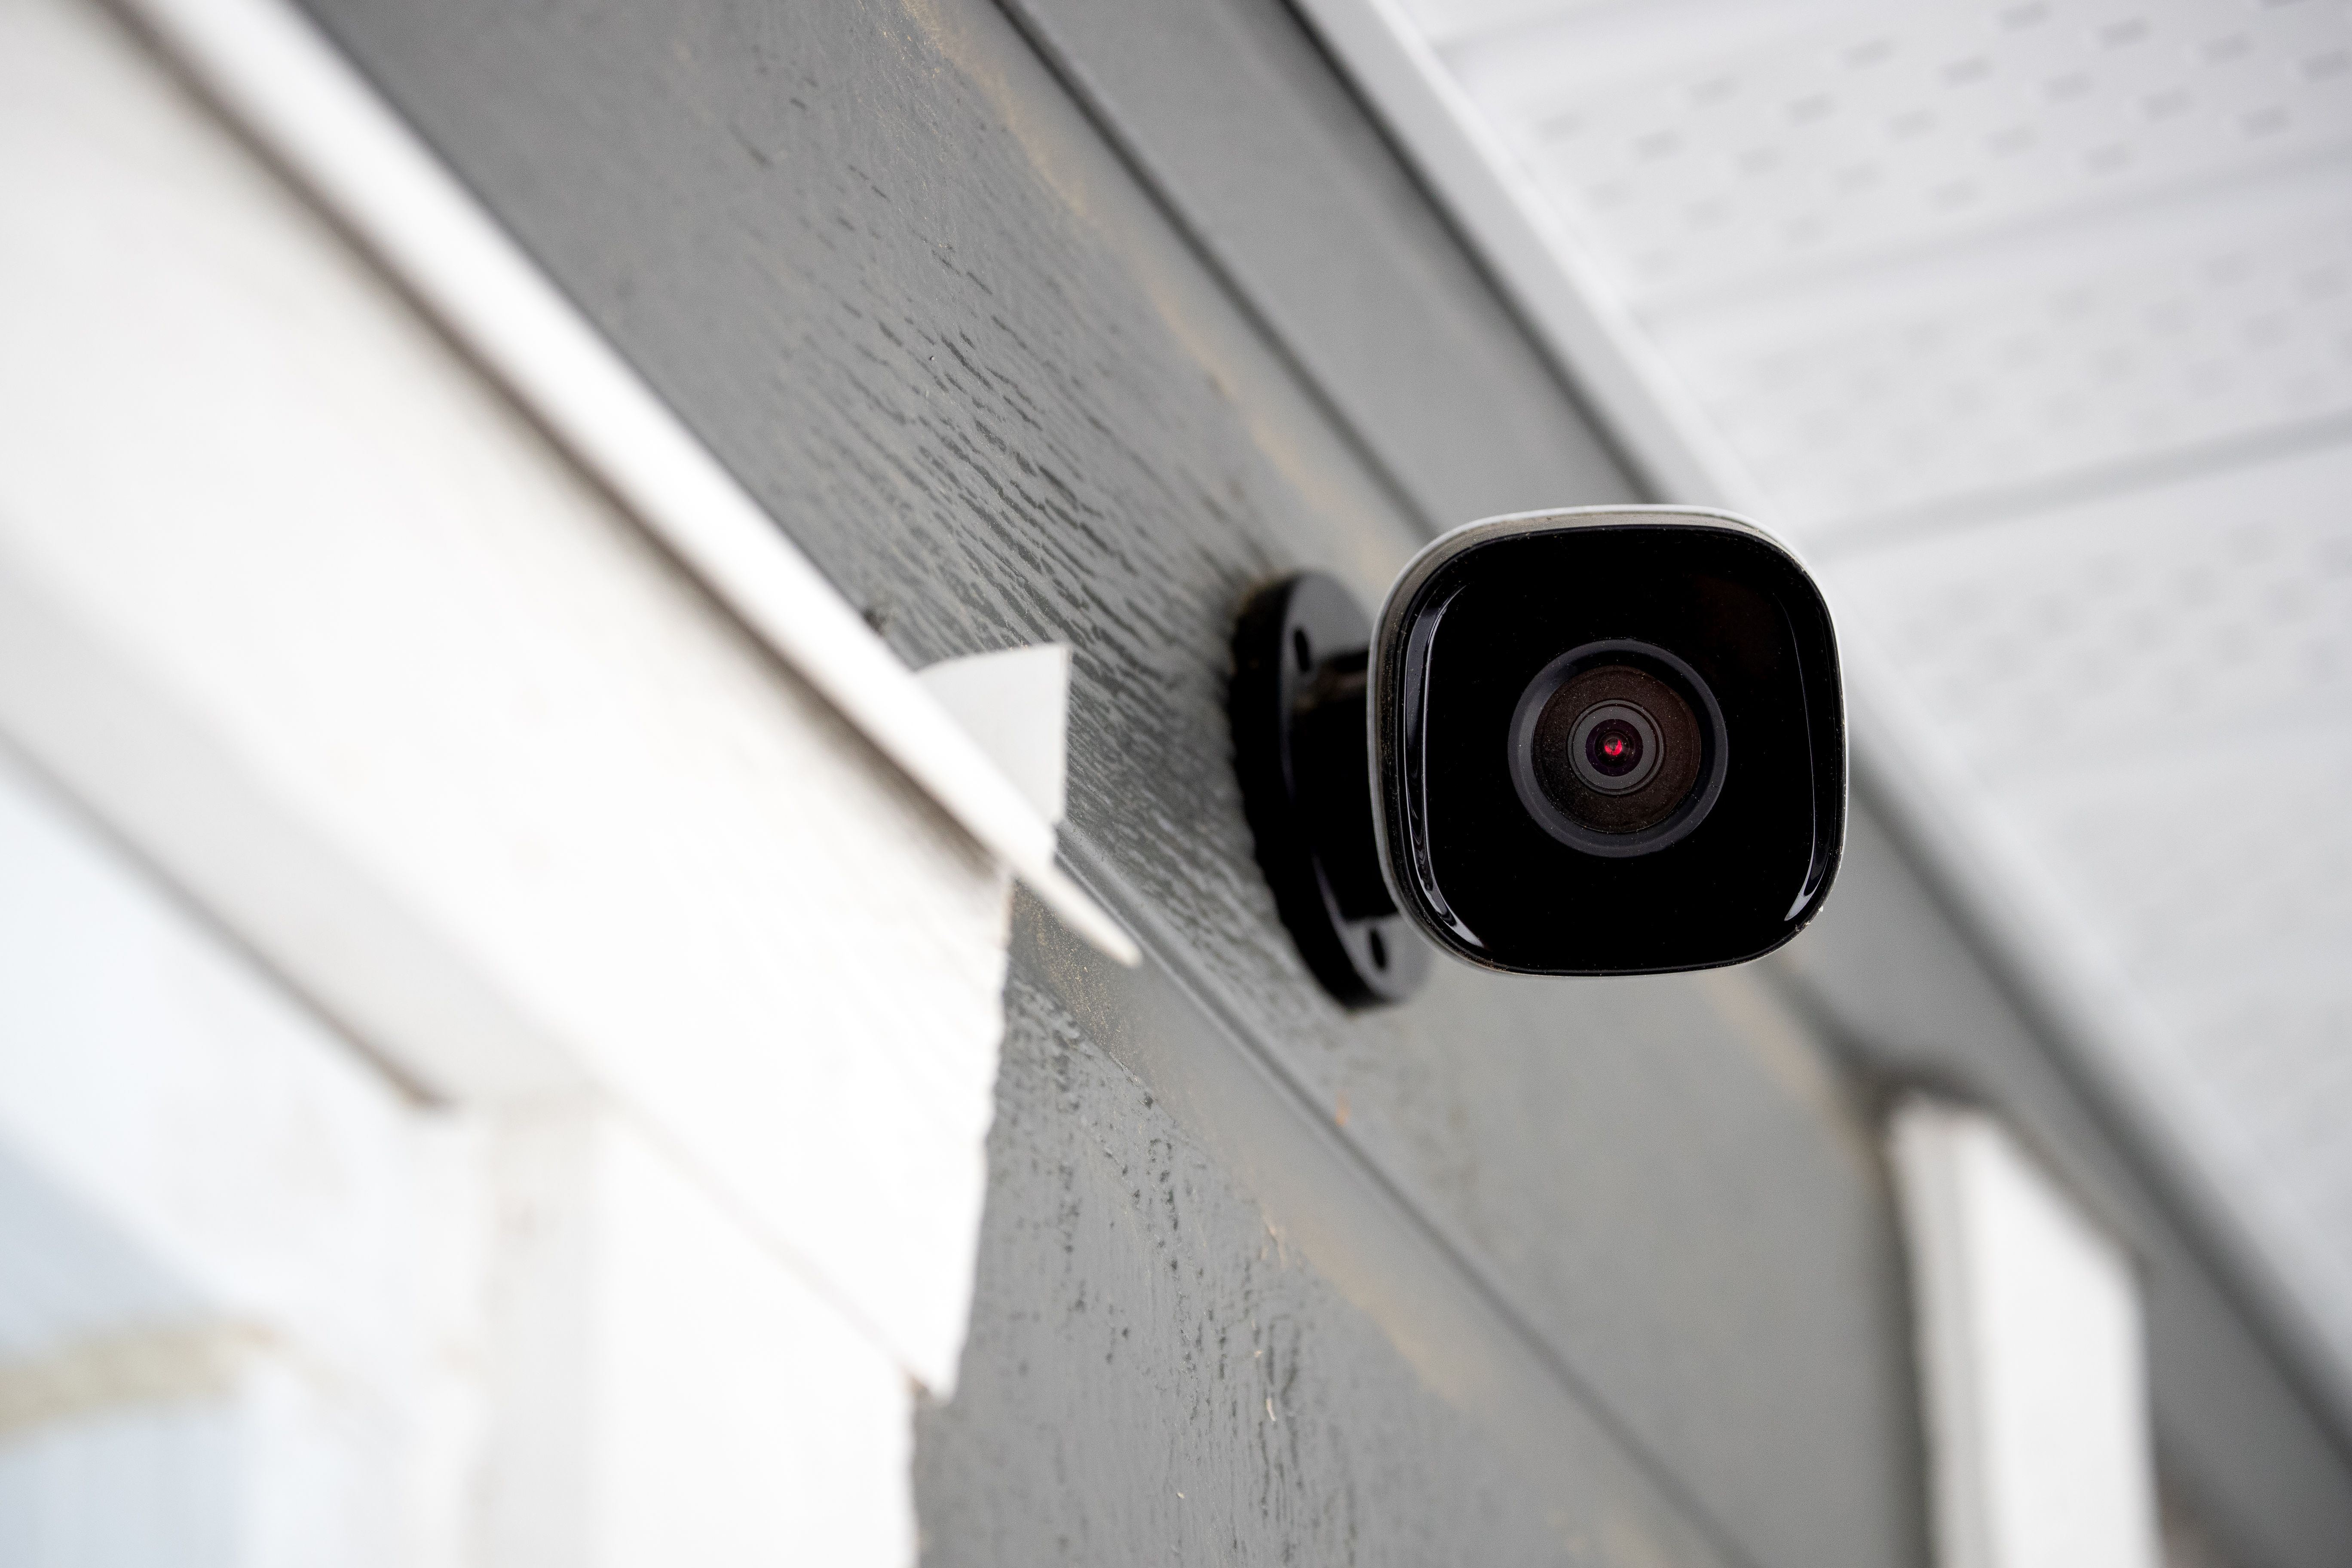
Choosing the Right Locations
Strategically placing sensors and cameras is crucial for maximizing the effectiveness of your security system. Focus on high-risk entry points such as front doors, back doors, and windows on the ground floor. For homes with multiple levels, consider adding sensors to staircases or hallways that lead to bedrooms.
Step-by-Step Installation Guide
Once you have your tools and have identified key locations, follow these steps to install your security alarm system:
- Control Panel Setup: Usually placed near the main entrance for easy access. Mount it at eye level and ensure it’s close to a power source.
- Installing Sensors: Attach door and window sensors using adhesive strips or screws. Ensure they are aligned correctly for proper functioning.
- Mounting Cameras: Use a ladder to place cameras at optimal heights. Ensure they cover wide angles and are not obstructed by external elements.
Connecting Your System
After hardware installation, it's time to connect your system to any necessary networks. Most modern systems offer wireless connectivity, making it easier to link components without extensive wiring. Follow the manufacturer’s instructions to connect your system to Wi-Fi and test each sensor and camera for functionality.

Testing and Maintenance
Once everything is set up, perform a comprehensive test of the entire system. Trigger the sensors and check if alerts are being sent correctly to your mobile device. Regular maintenance is essential; check batteries periodically and ensure all components are in working order.
Document any troubleshooting steps provided in the manual for quick reference in case issues arise in the future. Keeping software up-to-date can also enhance security features and compatibility with smart home devices.
The Benefits of DIY Installation
Installing a security alarm system on your own not only saves money but also gives you control over every aspect of your home’s safety. You become familiar with each component and how it integrates into the broader security network. Plus, with advancements in user-friendly technology, DIY installations are more manageable than ever.
Taking the time to install a security alarm system in your Dunkirk home can significantly enhance your sense of safety. By following this guide, you can ensure that you’re well-protected while enjoying the satisfaction of having completed an important home improvement project on your own.